AWS App Runner is no longer open to new customers. Existing customers can continue to use the service as normal. For more information, see AWS App Runner availability change.
Getting started with App Runner
AWS App Runner is an AWS service that provides a fast, simple, and cost-effective way to turn an existing container image or source code directly into a running web service in the AWS Cloud.
This tutorial covers how you can use AWS App Runner to deploy your application to an App Runner service. It walks through configuring the source code and deployment, the service build, and the service runtime. It also shows how to deploy a code version, make a configuration change, and view logs. Last, the tutorial shows how to clean up the resources that you created while following the tutorial's procedures.
Topics
Prerequisites
Before you start the tutorial, be sure to take the following actions:
-
Complete the setup steps in Setting up for App Runner.
-
Decide if you'd like to work with either a GitHub repository or a Bitbucket repository.
-
To work with a Bitbucket, first create a Bitbucket
account, if you don't already have one. If you're new to Bitbucket, see Getting started with Bitbucket in the Bitbucket Cloud Documentation. -
To work with GitHub, create a GitHub
account, if you don't already have one. If you're new to GitHub, see Getting started with GitHub in the GitHub Docs. Note
You can create connections to multiple repository providers from your account. So if you'd like to walk through deploying from both a GitHub and a Bitbucket repository, you can repeat this procedure. The next time through create a new App Runner service and create a new account connection for the other repository provider.
-
-
Create a repository in your repository provider account. This tutorial uses the repository name
python-hello. Create files in the root directory of the repository, with the names and content specified in the following examples.
Example requirements.txt
pyramid==2.0
Example server.py
from wsgiref.simple_server import make_server
from pyramid.config import Configurator
from pyramid.response import Response
import os

def hello_world(request):
    name = os.environ.get('NAME')
    if name == None or len(name) == 0:
        name = "world"
    message = "Hello, " + name + "!\n"
    return Response(message)

if __name__ == '__main__':
    port = int(os.environ.get("PORT"))
    with Configurator() as config:
        config.add_route('hello', '/')
        config.add_view(hello_world, route_name='hello')
        app = config.make_wsgi_app()
    server = make_server('0.0.0.0', port, app)
    server.serve_forever()
Step 1: Create an App Runner service
In this step, you create an App Runner service based on the example source code repository that you created on GitHub or Bitbucket as part of Prerequisites. The example contains a simple Python website. These are the main steps you take to create a service:
-
Configure your source code.
-
Configure source deployment.
-
Configure application build.
-
Configure your service.
-
Review and confirm.
The following diagram outlines the steps for creating an App Runner service:

To create an App Runner service based on a source code repository
-
Configure your source code.
-
Open the App Runner console
, and in the Regions list, select your AWS Region. -
If the AWS account doesn't have any App Runner services yet, the console home page is displayed. Choose Create an App Runner service.

If the AWS account has existing services, the Services page with a list of your services is displayed. Choose Create service.

-
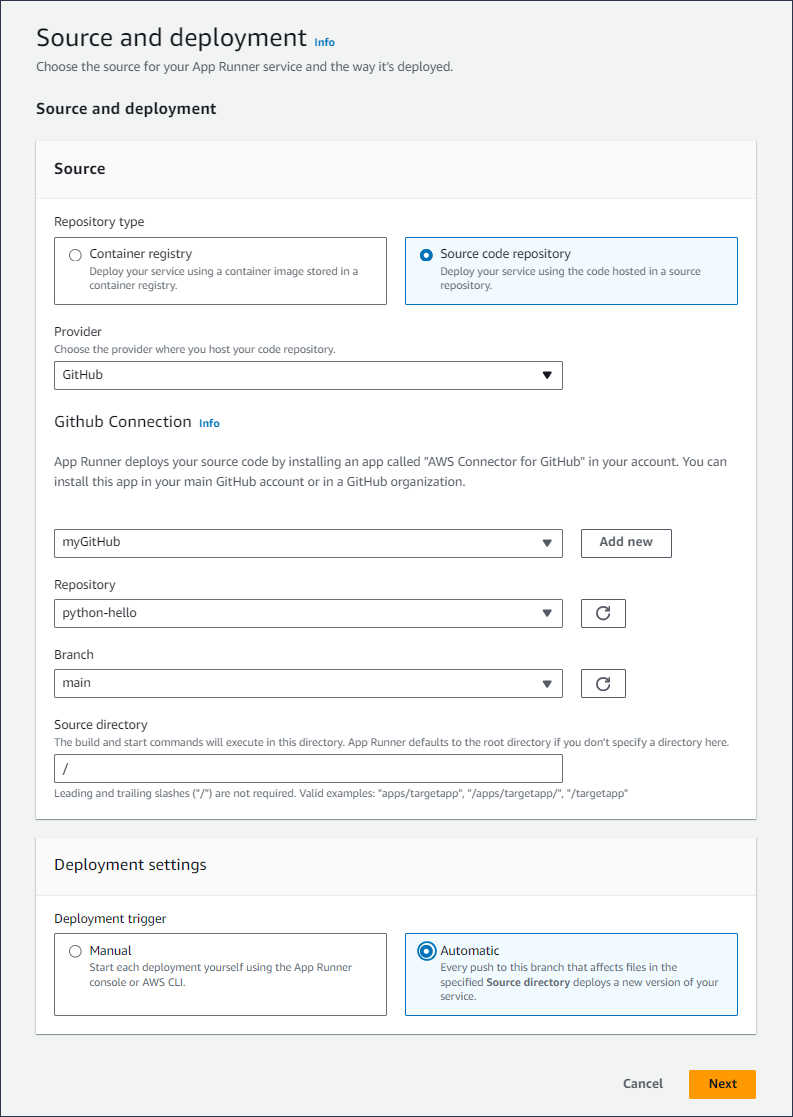
On the Source and deployment page, in the Source section, for Repository type, choose Source code repository.
-
Select a Provider Type. Choose either GitHub or Bitbucket.
-
Next choose Add new. If prompted, provide your GitHub or Bitbucket credentials.
-
Choose the next set of steps based on the Provider type you previously selected.
Note
The following steps to install the AWS connector for GitHub to your GitHub account are one-time steps. You can reuse the connection for creating multiple App Runner services based on repositories in this account. When you have an existing connection, choose it and skip to repository selection.
The same applies to the AWS connector for your Bitbucket account. If you're using both GitHub and Bitbucket as source code repositories for your App Runner services, you'll need to install one AWS Connector for each provider. You can then reuse each connector for creating more App Runner services.
-
For GitHub, follow these steps.
-
On the next screen, enter a Connection Name.
-
If this your first time using GitHub with App Runner, select Install another.
-
In the AWS Connector for GitHub dialog box, if prompted, choose your GitHub account name.
-
If prompted to authorize the AWS Connector for GitHub, choose Authorize AWS Connections.
-
In the Install AWS Connector for GitHub dialog box,Choose Install.
Your account name appears as the selected GitHub account/organization. You can now choose a repository in your account.
-
For Repository, choose the example repository you created,
python-hello. For Branch, choose the default branch name of your repository (for example, main). -
Leave Source directory with the default value. The directory defaults to the repository root. You stored your source code in the repository root directory in the previous Prerequisites steps.
-
-
For Bitbucket, follow these steps.
-
On the next screen, enter a Connection Name.
-
If this your first time using Bitbucket with App Runner, select Install another.
-
In the AWS CodeStar requests access dialog box, you can select your workspace and grant access to AWS CodeStar for Bitbucket integration. Select your workspace, then select Grant access.
-
Next you'll be redirected to the AWS console. Verify that the Bitbucket application is set to the correct Bitbucket workspace and select Next.
-
For Repository, choose the example repository you created,
python-hello. For Branch, choose the default branch name of your repository (for example, main). -
Leave Source directory with the default value. The directory defaults to the repository root. You stored your source code in the repository root directory in the previous Prerequisites steps.
-
-
-
-
Configure your deployments: In the Deployment settings section, choose Automatic, and then choose Next.
Note
With automatic deployment, each new commit to your repository source directory automatically deploys a new version of your service.
-
Configure application build.
-
On the Configure build page, for Configuration file, choose Configure all settings here.
-
Provide the following build settings:
-
Runtime – Choose Python 3.
-
Build command – Enter
pip install -r requirements.txt. -
Start command – Enter
python server.py. -
Port – Enter
8080.
-
-
Choose Next.
Note
The Python 3 runtime builds a Docker image using a base Python 3 image and your example Python code. It then launches a service that runs a container instance of this image.

-
-
Configure your service.
-
On the Configure service page, in the Service settings section, enter a service name.
-
Under Environment variables, select Add environment variable. Provide the following values for the environment variable.
-
Source – Choose Plain text
-
Environment variable name –
NAME -
Environment variable value – any name (for example, your first name).
Note
The example application reads the name you set in this environment variable and displays the name on its webpage.
-
-
Choose Next.

-
-
On the Review and create page, verify all the details you've entered, and then choose Create and deploy.
If the service is successfully created, the console shows the service dashboard, with a Service overview of the new service.

-
Verify that your service is running.
-
On the service dashboard page, wait until the service Status is Running.
-
Choose the Default domain value—it's the URL to the website of your service.
Note
To augment the security of your App Runner applications, the *.awsapprunner.com domain is registered in the Public Suffix List (PSL)
. For further security, we recommend that you use cookies with a __Host-prefix if you ever need to set sensitive cookies in the default domain name for your App Runner applications. This practice will help to defend your domain against cross-site request forgery attempts (CSRF). For more information see the
-